Need Help With Your Screen?
Get the Perfect Fit…Every Time!
Find complete guides to measuring, installing, adjusting, and troubleshooting Sentry Screens magnetic screen doors
Find the right size, install your screen correctly, make adjustments, and troubleshoot any issues. Most problems are solved in minutes — contact us before starting a return.
Measure and Select
Choosing the right size before you buy saves a lot of time. Measure your door opening, then use the table below to pick the right screen.
Measure the opening WIDTH
Measure the width of the door opening from the inside of the door frame — not the door itself. Measure at both the top and bottom and use the smaller number.
Measure the opening HEIGHT
Measure from the door threshold (floor level) up to the inside of the top frame. Measure on both sides and use the smaller number.
Match to the size chart
Select the product. Then find the row in the table below where your measurements fall within the “fits up to” range. The screen should be equal to or slightly larger than your opening.
Size Selection Guide
Not sure which door type you have? Single door = one door panel. French / patio = two side-by-side panels. Garage = large rolling or sectional overhead door. If you bought a one-size-fits-all screen, go to the Install tab for installation instructions and videos.
| Door Opening Width | Door Opening Height | Select Size |
|---|---|---|
| < 26″ | < 79″ | 28″w x 80″h (Canada) |
| 26″ – 30″ | < 79″ | 32″w x 80″h (Canada) |
| 26″ – 30″ | 79″ – 82″ | 32″w x 83″h (Canada) |
| 26″ – 30″ | 82″ – 95″ | 32″w x 96″h (Canada) |
| 30″ – 34″ | < 79″ | 36″w x 80″h (Canada) |
| 30″ – 34″ | 79″ – 82″ | 36″w x 83″h (Canada) |
| 30″ – 34″ | 82″ – 95″ | 36″w x 96″h (Canada) |
| 34″ – 37″ | < 79″ | 39″w x 80″h (Canada) |
| 34″ – 37″ | 79″ – 82″ | 39″w x 83″h (Canada) |
| 34″ – 37″ | 82″ – 95″ | 39″w x 96″h (Canada) |
| 37″ – 46″ | 79″ – 82″ | 48″w x 83″h (Canada) |
| 37″ – 46″ | 82″ – 95″ | 48″w x 96″h (Canada) |
| 46″ – 58″ | 82″ – 85″ | 60″w x 86″h (Canada) |
| 58″ – 62″ | 82″ – 85″ | 64″w x 86″h (Canada) |
| 62″ – 70″ | 85″ – 95″ | 72″w x 96″h (Canada) |
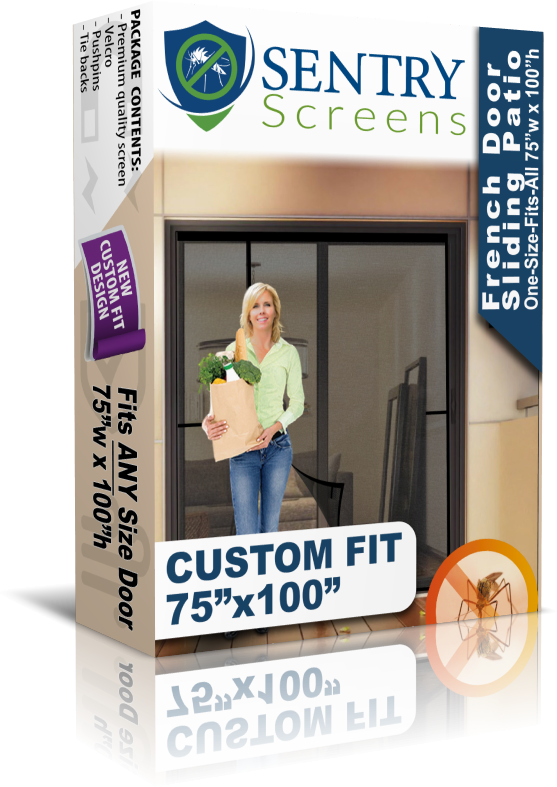
Try Our Custom-Fit Screens
If your door falls within a standard size but you’re not sure which option to pick, the single-door Custom-Fit screen takes the guesswork out entirely. Two panels trim to fit any door up to 50″w x 100″h, installs with adhesive hook-and-loop tape in minutes, and gives you the same full-length magnetic closure and heavy-duty fiberglass mesh as the rest of the Sentry Screens lineup.


| Door Opening Width | Door Opening Height | Select Size |
|---|---|---|
| < 58″ | < 85″ | 60″w x 86″h (Canada) |
| 58″ – 62″ | < 85″ | 64″w x 86″h (Canada) |
| 58″ – 62″ | 85″ – 95″ | 64″w x 96″h (Canada) |
| 62″ – 70″ | < 85″ | 72″w x 86″h (Canada) |
| 62″ – 70″ | 85″ – 95″ | 72″w x 96″h (Canada) |
Try Our Custom-Fit Screens
If your door falls within a standard size but you’re not sure which option to pick, the single-door Custom-Fit screen takes the guesswork out entirely. Two panels trim to fit any door up to 50″w x 100″h, installs with adhesive hook-and-loop tape in minutes, and gives you the same full-length magnetic closure and heavy-duty fiberglass mesh as the rest of the Sentry Screens lineup.
| Door Opening Width | Door Opening Height | Select Size |
|---|---|---|
| < 8′ | < 7′ | 8’w x 7’h (Canada) |
| < 8′ | 7′ – 8′ | 8’w x 8’h (Canada) |
| 8′ – 9′ | < 7′ | 9’w x 7’h (Canada) |
| 8′ – 9′ | 7′ – 8′ | 9’w x 8’h (Canada) |
| 9′ – 10′ | < 7′ | 10’w x 7’h (Canada) |
| 10′ – 16′ | < 7′ | 16’w x 7’h (Canada) |
| 10′ – 16′ | 7′ – 8′ | 16’w x 8’h (Canada) |
| 16′ – 18′ | 7′ – 8′ | 18’w x 8’h (Canada) |
Still Need Help?
No worries! Contact us with your door opening dimensions and we’ll tell you exactly what size to select.
Installation
Select your door type below to find the right installation video and PDF guide. Watch the full video before starting — the magnetic attachment method is different from standard screen doors.
Tip: Although you can install the screen door alone, it is MUCH simpler and quicker with two people. One person holds the mesh in place, and adjusts accordingly, while the other person measures and makes sure it is positioned correctly. Unless you’re really tall, a small step would be helpful for the person holding the mesh.
Before you start
- If your door opens inward, install the screen on the outside of the door frame.
- If your door opens outward, install the screen on the inside of the door frame.
Custom-Fit Single Door Screens
Step 1: Clean the door frame
- Wipe down the entire door frame with hot soapy water or isopropyl (rubbing) alcohol.
- Let it dry completely before moving on.
- Any dirt, grease, or residue will cause the adhesive hook-tape to peel off over time.
Step 2: Measure and mark the door frame
- Measure the width of the door frame at both the top and bottom. Mark the center point of each with a pencil.
- Measure the height from the underside of the top frame down to the ground.
- Note both measurements — you’ll need them in the next two steps.
Step 3: Prepare and insert the magnets
- Using your height measurement from Step 2, cut the magnet strips to match the exact height of your door frame.
- Before inserting, hold the two cut strips near each other to check polarity. They should attract, not repel. If they push apart, flip one strip end-for-end.
- Slide the cut magnets into the pockets at the top of each side of the screen. Push & pull the magnets all the way to the bottom.
Step 4: Attach the plastic clip and hook-tape to the door frame
- Peel the backing off the plastic clip and stick it to the center mark at the top of the door frame. Press firmly for 30 seconds, then open the clip.
- Cut the hook-tape strips to length and stick them along the top and both sides of the door frame. Press firmly for 30 seconds per section.
- Place hook-tape on both sides of the plastic clip, but NOT over it.
Step 5: Hang the mesh
- Press the top of the mesh onto the hook-tape and across the plastic clip. The bottom of the screen should hang freely, about 1/8 to 1/4 inch off the ground. Don’t worry about excess length yet.
- Line up the bottom center of the screen with the ground mark you made in Step 2.
- Using the provided plastic tool, press the mesh firmly along the top and sides so the hook-tape fibers grip through the mesh holes.
Step 6: Secure and trim
- Attach the soft loop-tape strips to the hook-tape, sandwiching the mesh between them. Press firmly along the full length.
- Trim any excess mesh from the top and sides using scissors or a utility knife, cutting flush with the edge.
- Close the plastic clip over the mesh at the top.
- On wooden frames, tap the included tacks through the finished edging with a hammer for extra hold.
Installation Video

Before you start
- French doors: if your door opens inward, install the screen on the outside of the door frame. If it opens outward, install on the inside.
- Patio/sliding doors: always install on the outside of the door frame.
Custom-Fit French/Patio/Double Door Screens
Step 1: Clean the door frame
- Wipe down the entire door frame with hot soapy water or isopropyl (rubbing) alcohol.
- Let it dry completely before moving on.
- Any dirt, grease, or residue will cause the adhesive hook-tape to peel off over time.
Step 2: Measure and mark the door frame
- Measure across the top and bottom of the door frame, but only above and below the door panel that actually opens. Mark the center point at both the top and bottom with a pencil.
- Measure the height from the underside of the top frame down to the ground.
- Note both measurements — you’ll need them in the next two steps.
Step 3: Prepare and insert the magnets
- Using your height measurement from Step 2, cut the magnet strips to match the exact height of your door frame.
- Before inserting, hold the two cut strips near each other to check polarity. They should attract, not repel. If they push apart, flip one strip end-for-end.
- Slide the cut magnets into the pockets at the top of each side of the screen. Push & pull the magnets all the way to the bottom.
Step 4: Attach the plastic clip and hook-tape to the door frame
- Peel the backing off the plastic clip and stick it to the center mark (Step 2) at the top of the door frame. Press firmly for 30 seconds, then open the clip.
- Cut the hook-tape strips to length and stick them along the top and both sides of the door frame. Press firmly for 30 seconds per section.
- Place hook-tape on both sides of the plastic clip, but NOT over it.
Step 5: Hang the mesh
- Press the top of the mesh onto the hook-tape and across the plastic clip. The bottom of the screen should hang freely, about 1/8 to 1/4 inch off the ground. Don’t worry about excess length yet.
- Line up the bottom opening of the screen with the ground mark you made in Step 2.
- Using the provided plastic tool, press the mesh firmly along the top and sides so the hook-tape fibers grip through the mesh holes.
Step 6: Secure and trim
- Attach the soft loop-tape strips to the hook-tape, sandwiching the mesh between them. Press firmly along the full length.
- Trim any excess mesh from the top and sides using scissors or a utility knife, cutting flush with the edge.
- Close the plastic clip over the mesh at the top.
- On wooden frames, tap the included tacks through the finished edging with a hammer for extra hold.
Installation Video
Before you start
- If your door opens inward, install the screen on the outside of the door frame.
- If your door opens outward, install the screen on the inside of the door frame.
Fixed-Size Screens
Step 1: Clean the door frame
- Wipe down the entire door frame with hot soapy water or isopropyl (rubbing) alcohol.
- Let it dry completely before moving on.
- Any dirt, grease, or residue will cause the adhesive hook-tape to peel off over time.
Step 2: Mark the center
- Measure across the top of the door frame and mark the center point with a pencil.
- This keeps the screen aligned when you hang it.
Step 3: Prepare the hook-tape
- Lay the screen flat on the floor with the soft loop side facing up.
- Cut the hook-tape strips to length and attach them along the top and sides of the screen.
Step 4: Check the length
- Hold the screen up against the top of the door frame and check how far the bottom sits from the floor.
- It should hang about 1/8 to 1/4 inch above the ground.
- If it touches or drags on the floor, you’ll need to adjust it at the top before attaching. See Adjust tab above for hemming instructions.
Step 5: Attach top hook-tape
- Peel the white backing off the top hook-tape strip.
- Line up the center of the screen with the pencil mark on the door frame, keeping the bottom of the screen 1/8 to 1/4 inch off the ground.
- Press the top strip firmly against the frame and hold for 30 seconds.
- Attach the two top corners next, positioning them 1 to 2 cm below the top center strip. Press and hold each corner for 30 seconds.
Step 6: Attach the side hook-tape
- Peel the backing off the side strips one foot at a time as you work your way down the frame.
- Press each section firmly and hold for 30 seconds before moving to the next.
- Don’t pull the screen tight as you go down. Keep it relaxed so the magnets in the center can align and close properly.
- On wooden frames, use the included tacks for extra hold. Tap them gently through the hook-and-loop with a hammer.
Before you start
- French doors: if your door opens inward, install the screen on the outside of the door frame. If it opens outward, install on the inside.
- Patio/sliding doors: always install on the outside of the door frame.
Fixed-Size Screens
Step 1: Clean the door frame
- Wipe down the entire door frame with hot soapy water or isopropyl (rubbing) alcohol.
- Let it dry completely before moving on.
- Any dirt, grease, or residue will cause the adhesive hook-tape to peel off over time.
Step 2: Mark the center of the opening door
- Measure across the top of the door frame, but only above the door panel that actually opens. Mark the center of that panel with a pencil.
- The screen is reversible, so it works for both left-opening and right-opening doors.
Step 3: Prepare the screen and hook-tape
- Lay the screen flat on the floor.
- If your left door opens, position the screen so the opening (the slit in the mesh) is on the right side.
- If your right door opens, position the screen so the opening is on the left side.
- Cut the hook-tape strips to length and attach them along the top and sides of the screen.
Step 4: Check the length
- Hold the screen up against the top of the door frame and check how far the bottom sits from the floor.
- It should hang about 1/8 to 1/4 inch above the ground.
- If it touches or drags on the floor, you’ll need to adjust it at the top before attaching. See Adjust tab above for hemming instructions.
Step 5: Attach top hook-tape
- Peel the white backing off the top hook-tape strip.
- Line up the top of the screen opening with the pencil mark on the door frame, keeping the bottom of the screen 1/8 to 1/4 inch off the ground.
- Press the top strip firmly against the frame and hold for 30 seconds.
- Attach the two top corners next, positioning them 1 to 2 cm below the top center strip. Press and hold each corner for 30 seconds.
Step 6: Attach the side hook-tape
- Peel the backing off the side strips one foot at a time as you work your way down the frame.
- Press each section firmly and hold for 30 seconds before moving to the next.
- Don’t pull the screen tight as you go down. Keep it relaxed so the magnets in the center can align and close properly.
- On wooden frames, use the included tacks for extra hold. Tap them gently through the hook-and-loop with a hammer.
Before you start
- If your garage door opens outward, install the screen on the inside of the door frame.
- All other garage doors: install on the outside of the door frame.
Fixed-Size Screens
Step 1: Clean the door frame
- Wipe down the entire door frame with hot soapy water or isopropyl (rubbing) alcohol.
- Let it dry completely before moving on.
- Any dirt, grease, or residue will cause the adhesive hook-tape to peel off over time.
Step 2: Mark the center
- Measure across the top of the door frame and mark the center point with a pencil.
- This keeps the screen aligned when you hang it.
Step 3: Prepare the screen and hook-tape
- Lay the screen flat on the floor with the soft loop side facing up.
- Cut the hook-tape strips to length and attach them along the top and sides of the screen.
Step 4: Check the length
- Hold the screen up against the top of the door frame and check how far the bottom sits from the floor.
- It should hang about 1/8 to 1/4 inch above the ground.
- If it touches or drags on the floor, you’ll need to adjust it at the top before attaching. See Adjust tab above for hemming instructions.
Step 5: Attach top hook-tape
- Peel the white backing off the top hook-tape strip.
- Line up the center of the screen with the pencil mark on the door frame, keeping the bottom of the screen 1/8 to 1/4 inch off the ground.
- Press the top strip firmly against the frame and hold for 30 seconds.
- Attach the two top corners next, positioning them 1 to 2 cm below the top center strip. Press and hold each corner for 30 seconds.
Step 6: Attach the side hook-tape
- Peel the backing off the side strips one foot at a time as you work your way down the frame.
- Press each section firmly and hold for 30 seconds before moving to the next.
- Don’t pull the screen tight as you go down. Keep it relaxed so the magnets in the center can align and close properly.
- On wooden frames, use the included tacks for extra hold. Tap them gently through the hook-and-loop with a hammer.
Coming soon…
How To Fine-Tune Your Screen
Our custom-fit screens are designed to be trimmed to fit your door opening exactly to size. Our fixed-size screens can also be adjusted to fit the dimensions of your door opening.
The following adjustments can be made on the single door, French/patio/double door, garage door, or pet screen door.
Still Not Fitting?
If your door opening is an unusual size or shape, we may have a custom-fit options for single doors (up to 50″w x 100″h), French/patio/double doors (up to 75″w x 100″h), and toy hauler rear gates (up to 10.5’w x 8.5’h). Contact us before returning — we work through sizing issues every day.
Troubleshooting
Most Problems Are Fixable
Most installation issues can be corrected in under 5 minutes without returning or replacing the screen.
These are the most common issues customers run into after installation. Expand each one for a quick fix.
⚠️ Before you return: Over 90% of issues are fixable without sending your screen back. Check the list below — or contact us directly and we’ll walk you through it.
Contact us before returning. We may be able to exchange the size for you.
- Check the Measure tab to confirm your door measurements
- Email us with your door opening dimensions and order number and we’ll recommend the right size
- We handle size exchanges faster than an Amazon customer support rep
We’ll send replacement parts at no charge. No return needed!
- Visit https://go.sentryscreens.com/missing-parts to request the specific part
- Have your Amazon order number ready — we’ll verify and ship within 1 business day
Adhesive failures are almost always a surface prep issue.
- Clean the frame with isopropyl alcohol and let it dry fully before applying
- Press firmly for 30 seconds. Don’t just lay it on. PRESS AND HOLD!
- Avoid applying in cold temperatures (below 10C / 50F)
- Painted or textured wood frames sometimes need extra contact time. Hold for 30 – 60 seconds
This usually means the screen is slightly off-center or the magnets are misaligned.
- Recheck that the top tape is centered on the door frame
- Make sure that the top center is 1/4 to 1/2 inch higher than the top corners
- Check that the bottom edge is not dragging on the ground
- Make sure that the screen is not too tight (across the width) and pulling the magnets apart. If it is, you may need the next size up
- Make sure the screen hangs plumb — use a level if needed
- Check that no part of the screen is bunching near the center seam
- Wind or draft can also pull the screen open — try using the WindLocktm tabs if this is ongoing
Sagging is usually caused by insufficient tension at the top or the screen being too long.
- Ensure the top tape spans the full width of the frame with no gaps
- If the screen is longer than the door opening, fold the excess at the top. See the video below.
- On taller doors, make sure the side tape is evenly attached all the way down
Gaps at the edges mean the screen isn’t fully flush with the frame.
- Press the adhesive hook-tape firmly against the frame along the entire perimeter
- Check the bottom — if the screen doesn’t reach the threshold, you may need the next size up
- On French doors, make sure both panels are covered and the center seam aligns correctly
Still Having Trouble?
If none of the above resolves your issue, contact us directly. We respond within 24 hours and can usually fix the problem without a return.
Problems With Your Screen?
We resolve most issues quickly and can often save you the hassle of repacking and shipping the product back.
Before returning your screen, if you have questions, email us. If you are missing parts, let us know and we’ll ship them to you.
What to include in your message: Amazon order number, the screen type you purchased, your door dimensions (width x height), and a photo if the issue is visual. This helps us respond faster and resolve things in one message.
1. Check the Troubleshoot tab
Most common issues — magnets not closing, tape not sticking, gaps at edges — are fixed in under 10 minutes.
2. Contact us first
We can replace parts, exchange sizes, or walk you through installation. Email us and you’ll hear back within 24 hours.
3. We make it right
If the product is genuinely defective or wrong, we’ll take care of it — quickly and without the hassle of an Amazon return process.
John B